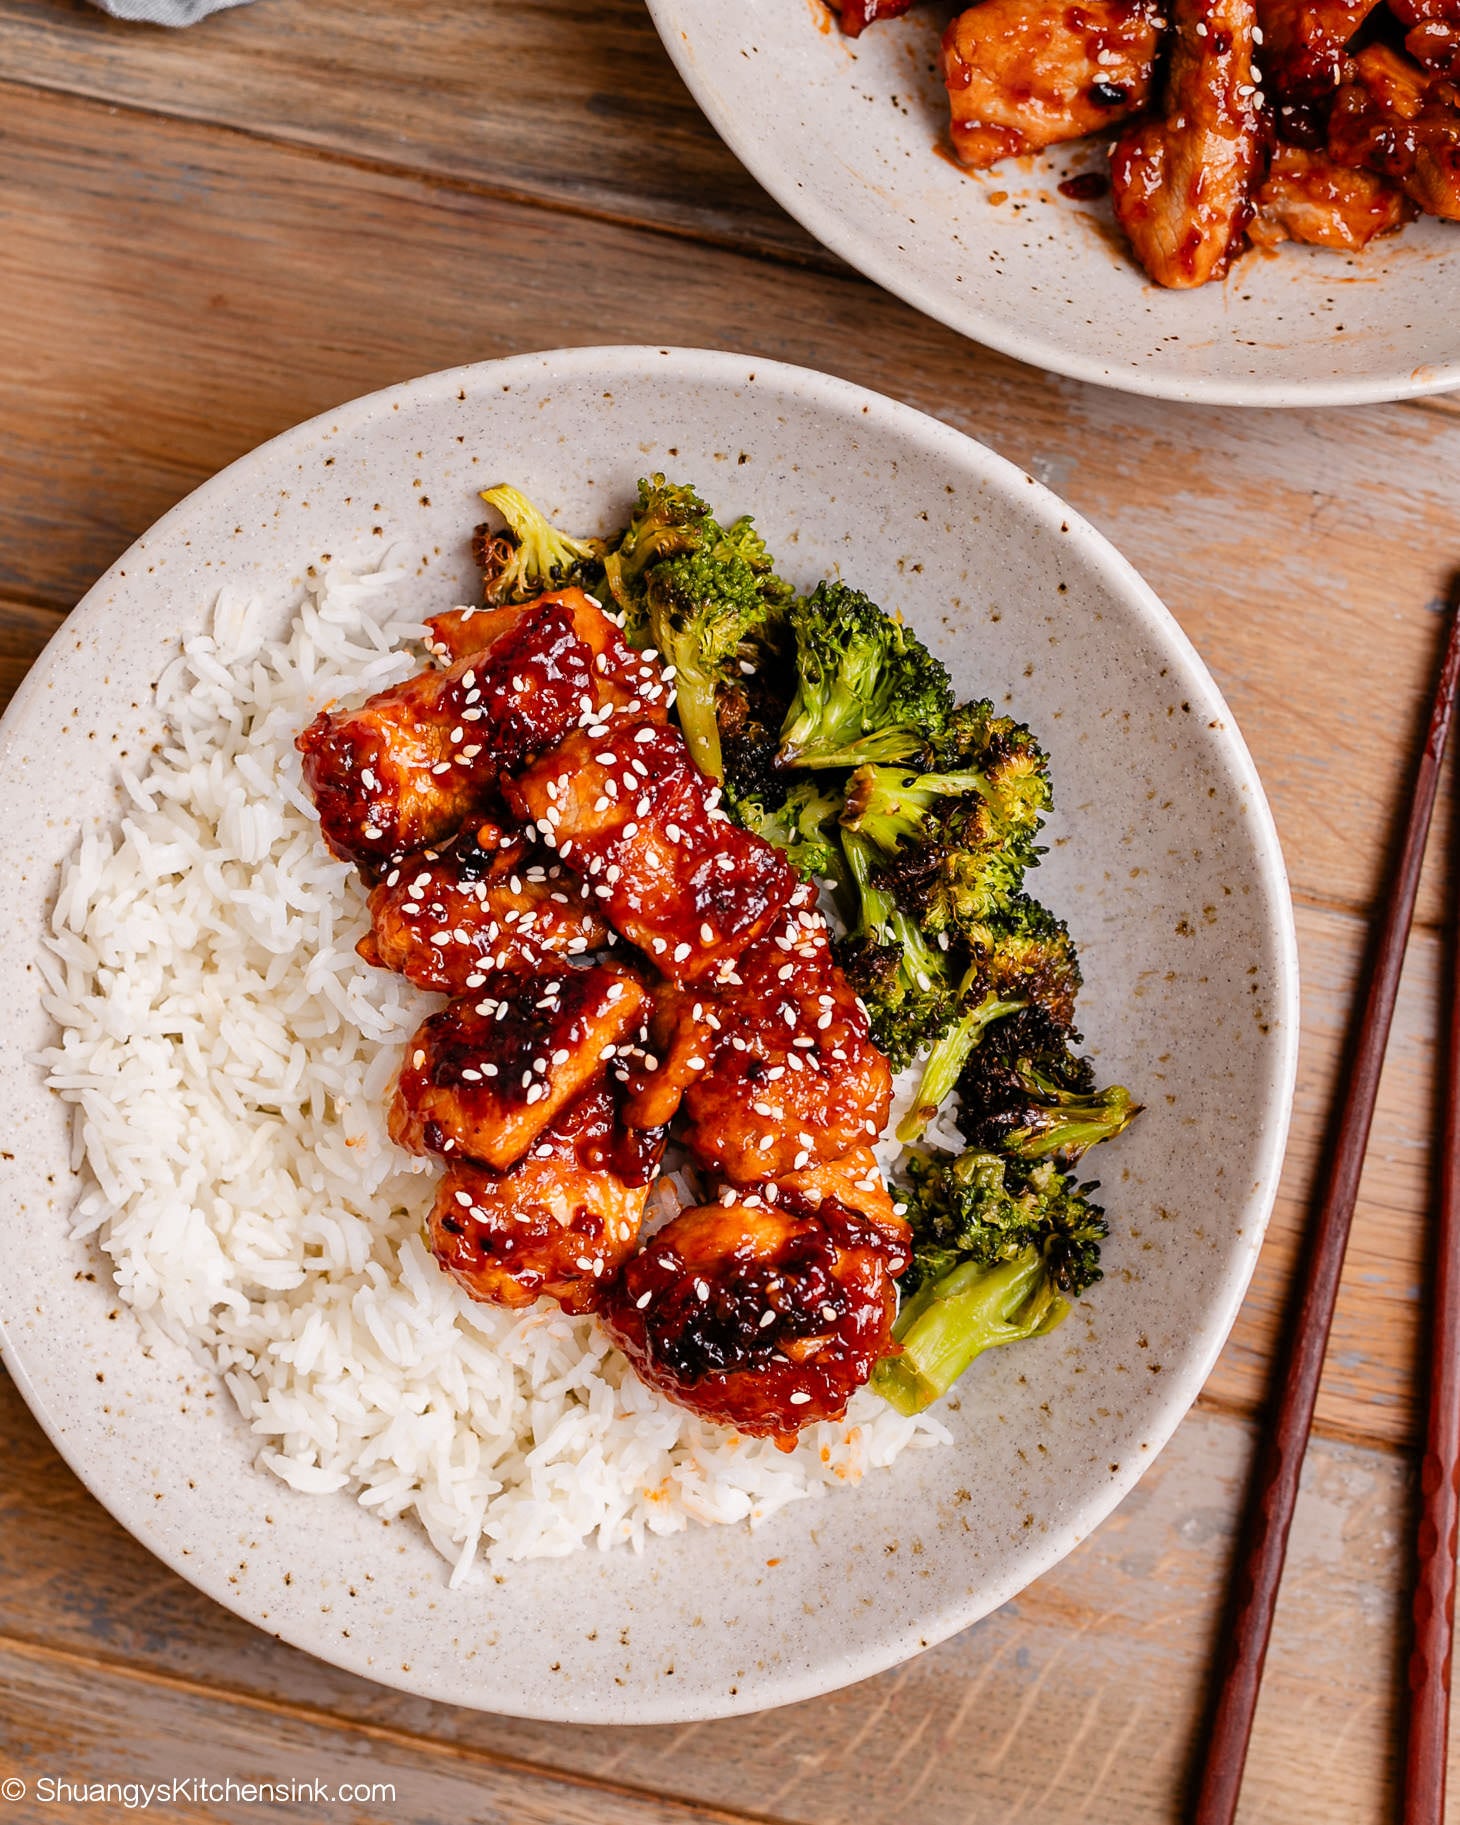
Crispy Sweet and Sour Pork (No Deep Frying!)
This sweet and sour pork is a cozy, homemade take on the classic—not your typical heavy takeout version. The pork strips are lightly breaded and pan-fried, giving you that golden, crispy outside with juicy tenderness inside (no deep fryer required!). Tossed in a simple honey-kissed sweet and sour sauce, it’s the kind of dinner that wins over picky little eaters while still feeling satisfying enough for the grown-ups at the table. Perfect for those busy weeknights when you want something quick, flavorful, and family-approved.
As a mom of two little boys, I know the weeknight dinner struggle is real. Some nights (most of the nights really), I just want something fast, but still healthy and comforting.
When I moved to the U.S. at 17, I quickly learned how much I missed the flavors of home.
Sweet and sour pork was one of those dishes that instantly reminded me of family dinners back in China. My parents often used rib meat, which has that perfect balance of fat and lean.
Although rib meat is not the most common cut of pork, I’ve adapted the recipe using cuts that are easier to find in American grocery stores, like pork shoulder or pork loin.
I’ve tested this recipe more times than I can count—calling my parents in China to ask exactly how they used to make the traditional version.
After lots of tweaking, I’ve landed on a version I’m truly proud of: crispy on the outside, juicy on the inside, and coated in a sauce that’s tangy but never overpowering.
The best part? It comes together quickly, without deep frying or a long list of hard-to-find ingredients. It’s exactly the kind of weeknight dinner busy moms like us need—you know what I mean?
What’s the Best Pork Cut for Sweet and Sour Pork?
For my busy moms out there cooking with kids tugging at their sleeves, choosing the right cut matters. Pork shoulder is more forgiving—it stays juicy even if slightly overcooked.
Pork loin is lean, so just be mindful not to over-fry it.
Tip: Cut the pork into even bite-sized strips. This not only cooks them faster (a lifesaver with hungry toddlers waiting) but also ensures every piece is equally crispy and saucy.
How to Make Sweet and Sour Pork


Marination is the Key to Deeper Flavors
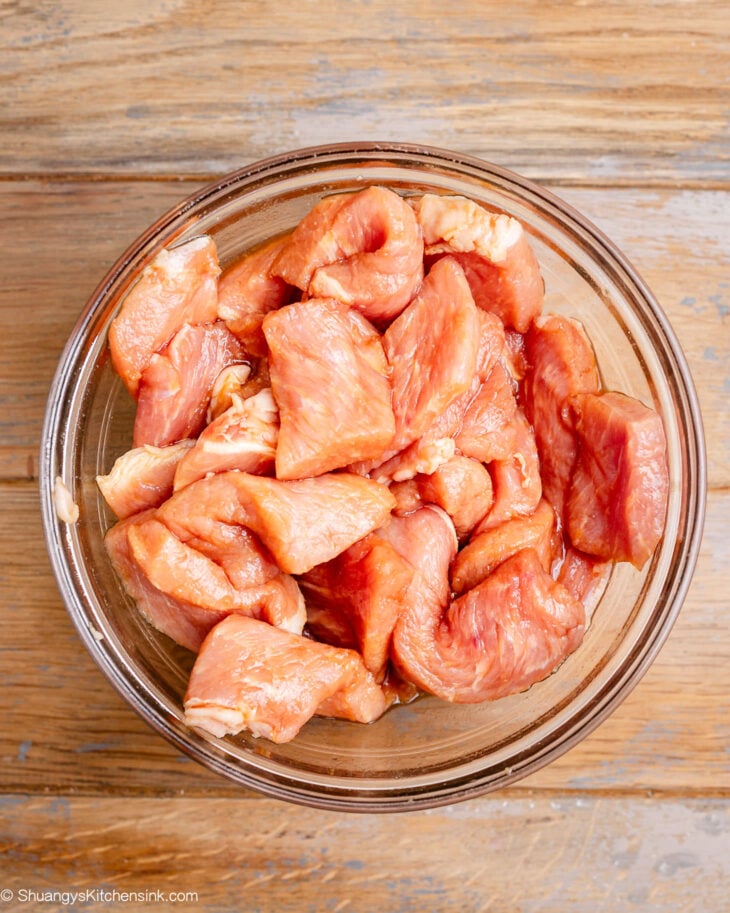
If there’s one thing I learned from my mom back in China, it’s this: never skip the marinade. Even a quick 20–30 minutes makes a world of difference.
Shaoxing wine is my go-to—it tenderizes the meat and enhances the natural sweetness. Coconut aminos (or soy sauce) bring savory depth. The flavors soak in while you prep veggies or clean up the kitchen, and the payoff is pork that tastes restaurant-worthy.
Pro tip: If you can, marinate overnight. On busy mornings, I’ll toss the pork in the marinade before heading out with the kids. By dinnertime, the flavor is incredible, and all I need to do is coat, fry, and toss in sauce.
Getting That Crispy Coating Without Deep Frying
Here’s where technique matters.
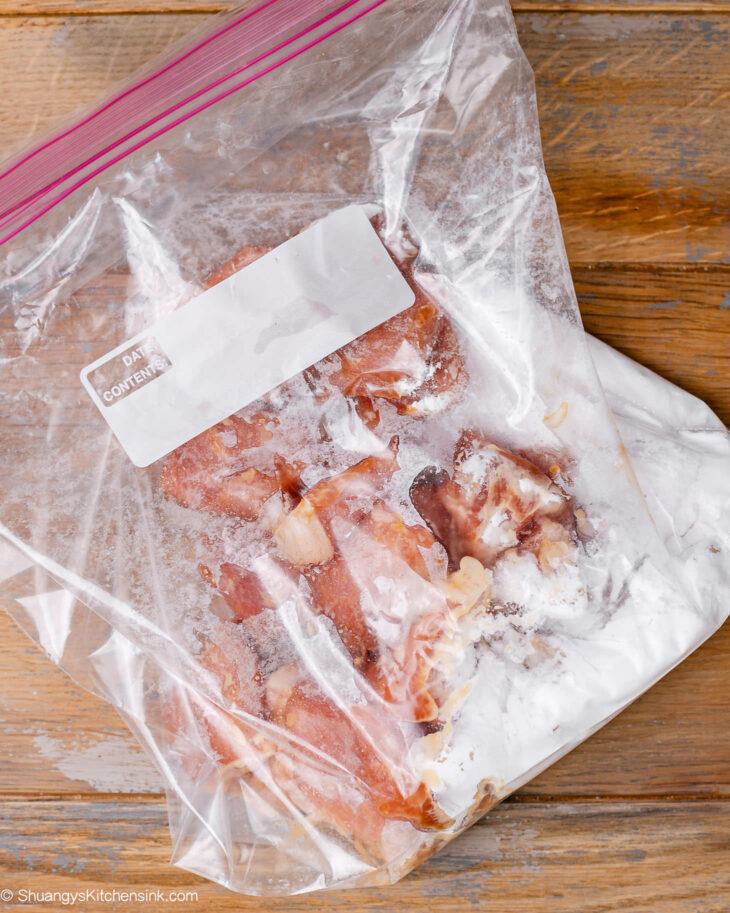
- Drain the pork well before coating so the starch sticks evenly.
- Use the “ziplock shake” method: toss the pork and starch in a sealed bag, shake, and you’ve got perfectly coated pieces without mess.
- Pan-fry in a thin layer of oil—no giant pot of hot oil needed.
If you want restaurant-style crispiness, try the double-fry method: pan-fry once, let the pieces rest, then give them a quick second fry. This removes extra moisture and locks in that crunch.
I don’t know about your kids, but mine will eat just about anything if it’s breaded and nugget-shaped.
That’s why this sweet and sour pork is such a win—it’s crispy enough to pass the nugget test and convince even my usual “I don’t like this!” kid to take another bite.
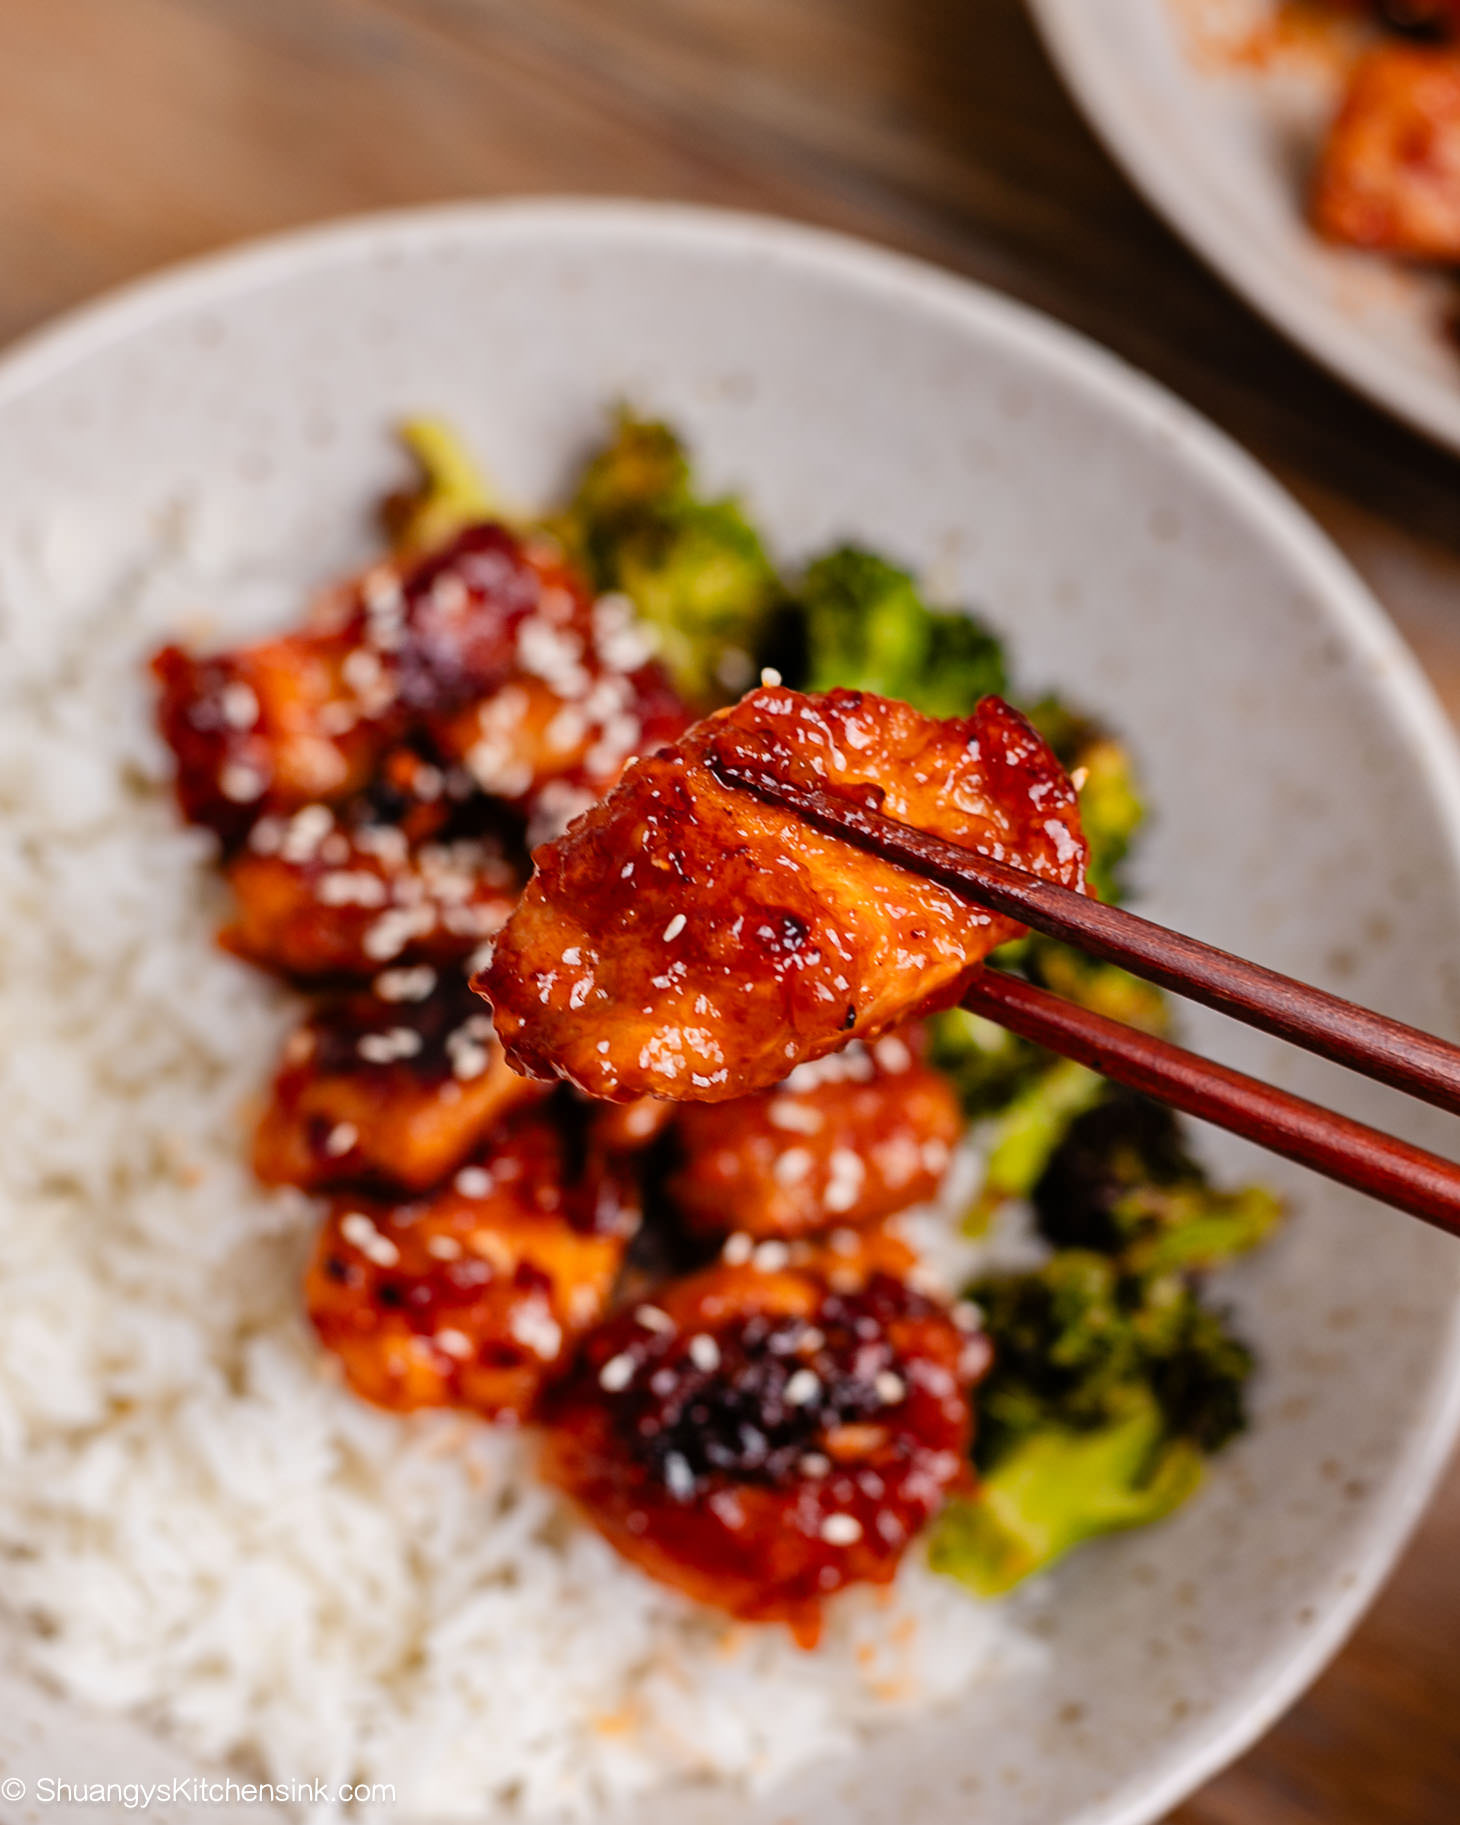
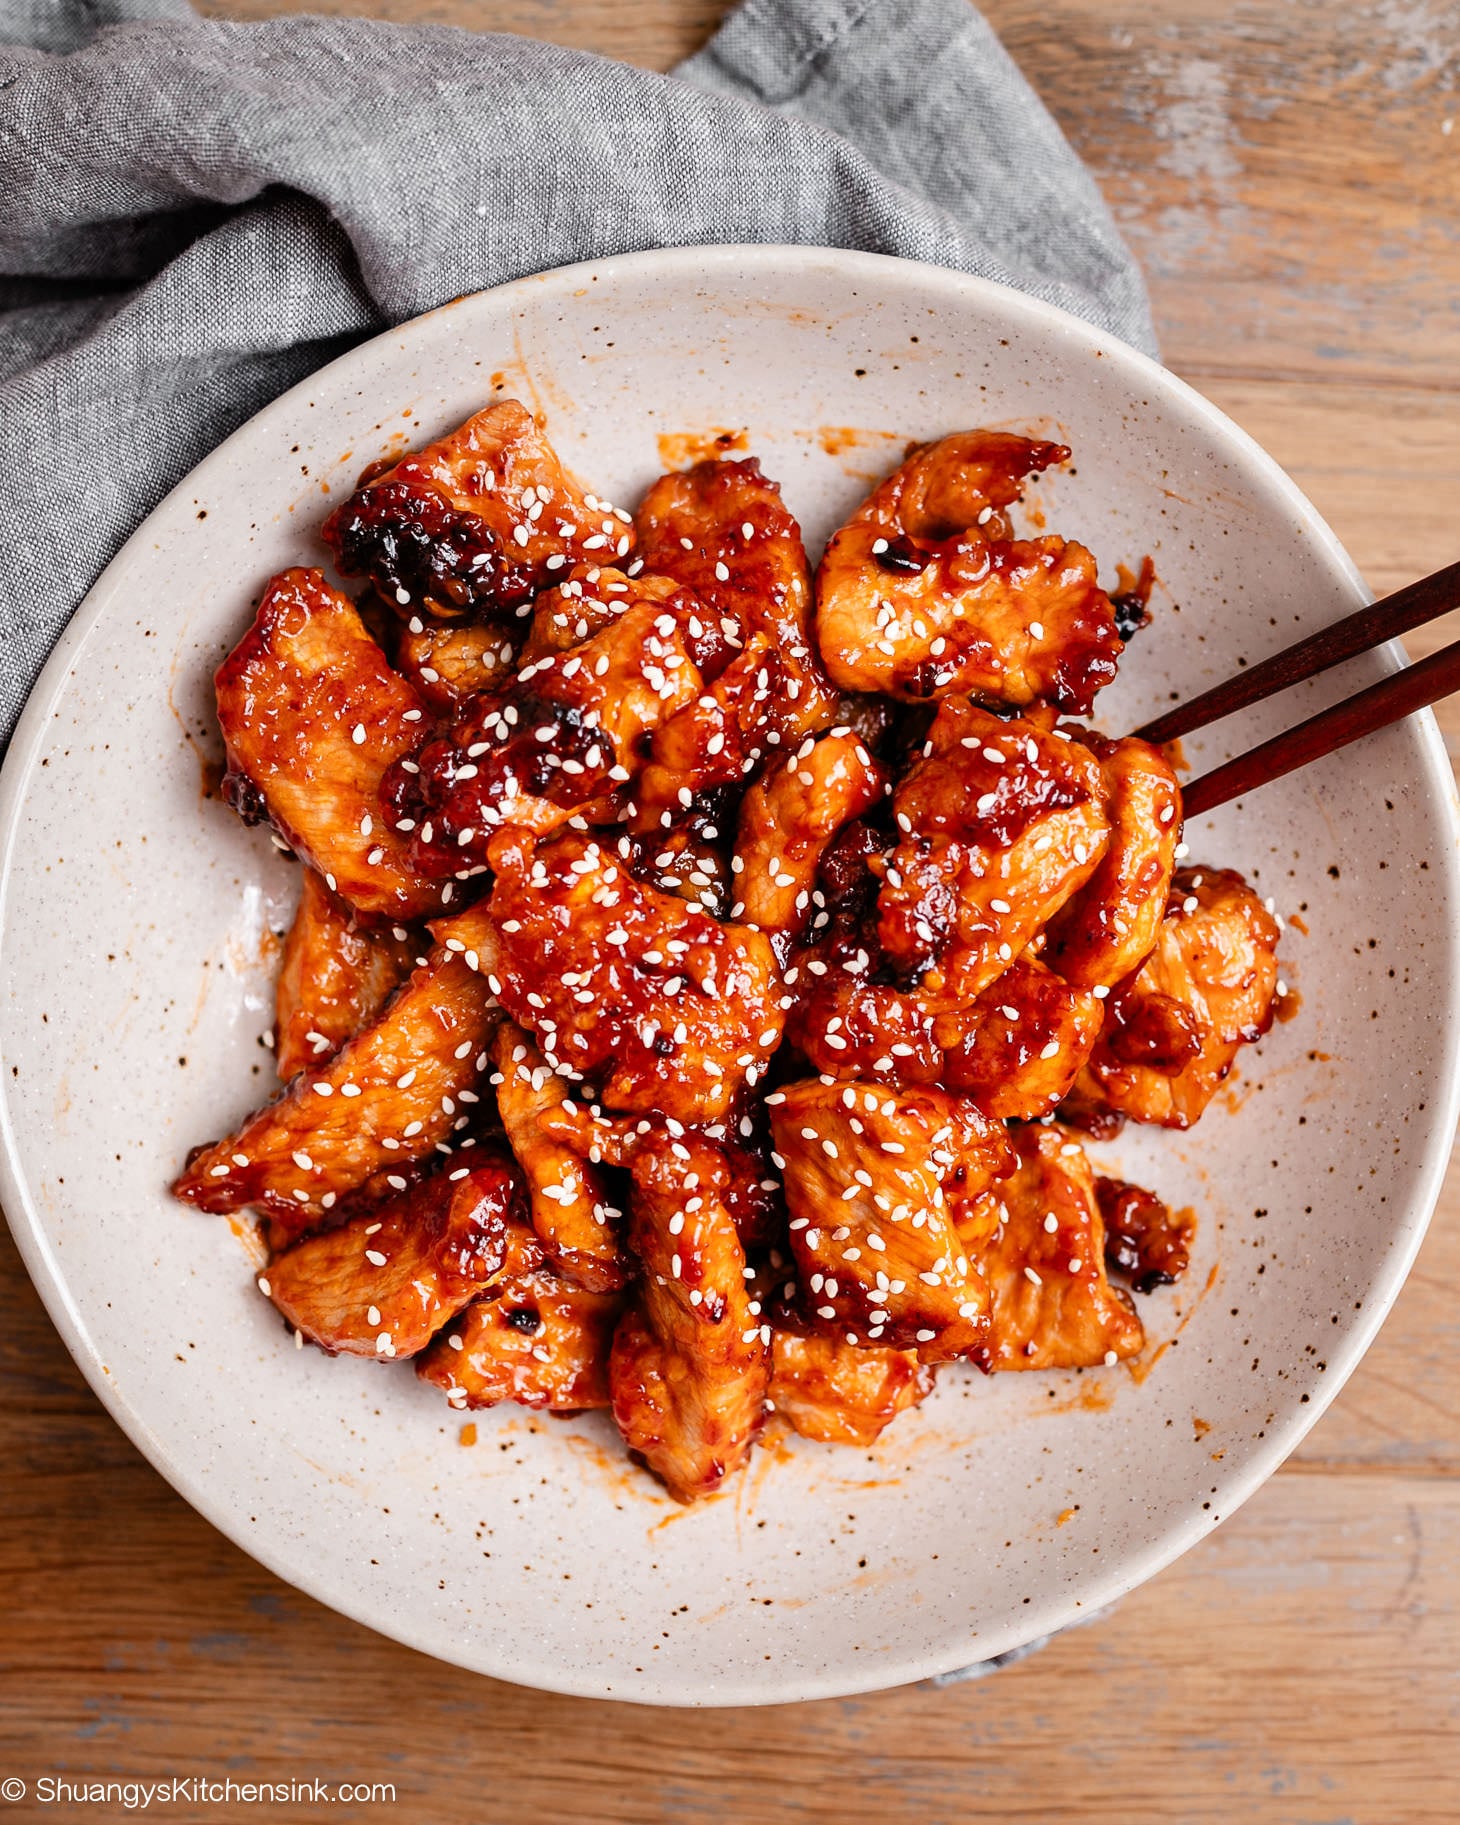
The Sauce is Made with Honey: Tangy, Sweet, and Sticky
The sauce is really what makes or breaks sweet and sour pork. Too much vinegar and it’s sharp, too much ketchup and it falls flat. My trick? Start with smaller amounts and adjust as you go—that way, you can find the balance that’s just right for your family’s taste.
I like to whisk together ketchup, rice vinegar, and honey until it turns glossy, then heat it gently before tossing in the pork. The sauce clings to those crispy edges, creating that sticky-sweet coating kids can’t resist.
I’ve tested this recipe with different sweeteners, but honey always wins for me. It gives the sauce a beautiful sticky texture and a subtle earthy flavor. Of course, if cane sugar is what you have on hand, that works too. And since honey feels like a more natural option, I don’t mind when my little ones go back for seconds.
Add Color and Flavor with Vegetables and Garnishes
This is where you can get creative (or sneak in a few more veggies for the picky ones):
- Pineapple – My kids fight over these tangy-sweet bites.
- Bell Peppers – Adds crunch, color, and makes the dish feel fresh.
- Garnishes – Sesame seeds and green onions make it look fancy with zero extra effort.
For moms who struggle with “eat your veggies” battles—pairing them with crispy pork and a glossy sauce suddenly makes peppers and pineapple the star of the plate.
Storing and Reheating Sweet and Sour Pork
This dish is best fresh, but leftovers can be lifesavers. Store in the fridge up to 3 days. Reheat in a skillet or air fryer to bring back some of the crispiness.
Here’s how it looks in real life at my house: my 4-year-old usually goes straight for the pork, my toddler picks out the pineapple chunks, and I happily finish the peppers.
Everyone’s happy. Am i right mamas?
Sweet and sour pork may look like a “special occasion” dish, but with this version, it can be your weeknight hero. Crispy pork, sticky-sweet sauce, pops of color from peppers and pineapple—it’s everything I loved growing up in China, simplified for my life as a busy mom in the U.S.
If you give this a try, let me know how your family liked it. Did your kids surprise you by eating the veggies? Did you sneak in an extra pineapple chunk for yourself? Drop a comment below—I’d love to hear your stories.
Happy cooking from my kitchen to yours!
Get the recipe:Crispy Sweet and Sour Pork (No Deep Frying!)
Ingredients
- 1.2 – 1.5 lb Pork chop, cut into strips
- 1.5 tsp salt, or to taste
- 2 tbsp Shaoxing Wine, optional, see notes
- 3/4 cup starch, more options see notes
Sweet and Sour Sauce
- 1/3 cup ketchup
- 3 tbsp rice vinegar
- 1/4 cup honey, or sugar
Optional Garnishes
- Sesame seeds
- chopped green onions
Equipment
Instructions
Marinate the Pork
- In a large bowl, season the pork strips with salt and Shaoxing wine (if using).
- Let it marinate for at least 30 minutes. For deeper flavor, marinate in the fridge for a few hours or overnight.
Coat the Pork
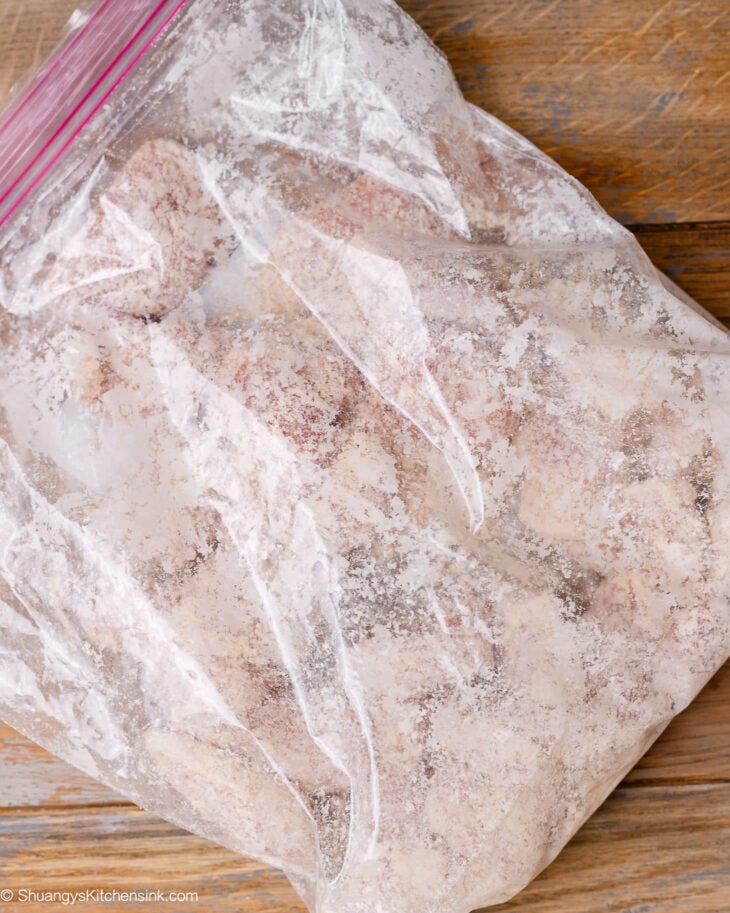
- Place the starch into a large zip-top bag.
- Drain the pork from any excess marinade (discard the liquid), then add the pork strips into the bag.
- Seal and shake until every piece is evenly coated.
Pan-Fry Until Crispy
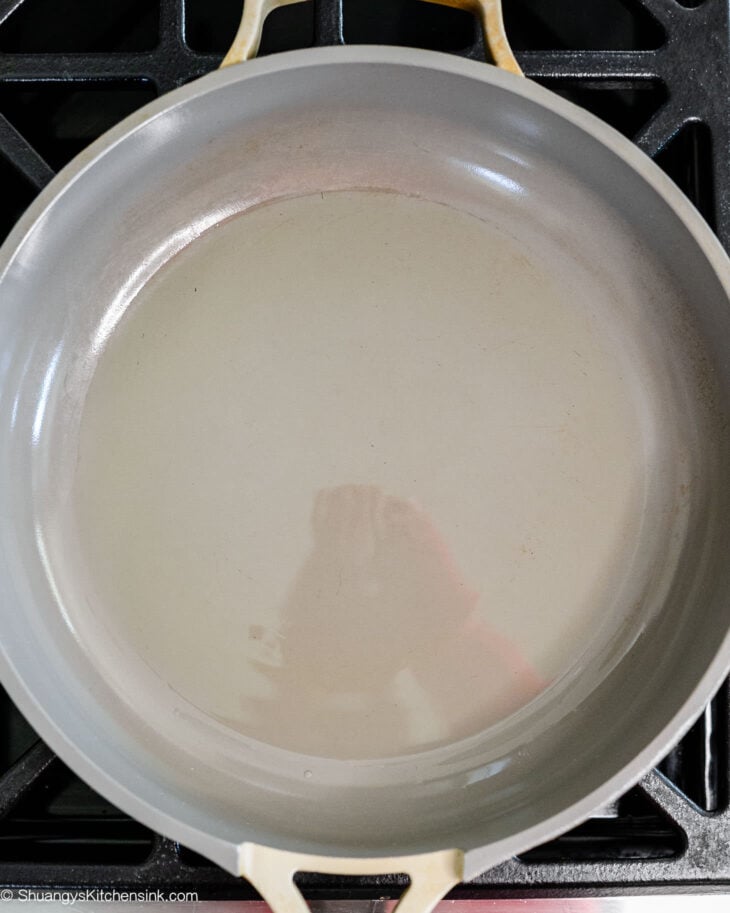
- Heat a thin layer of oil in a non-stick wok or skillet over medium heat until shimmering.
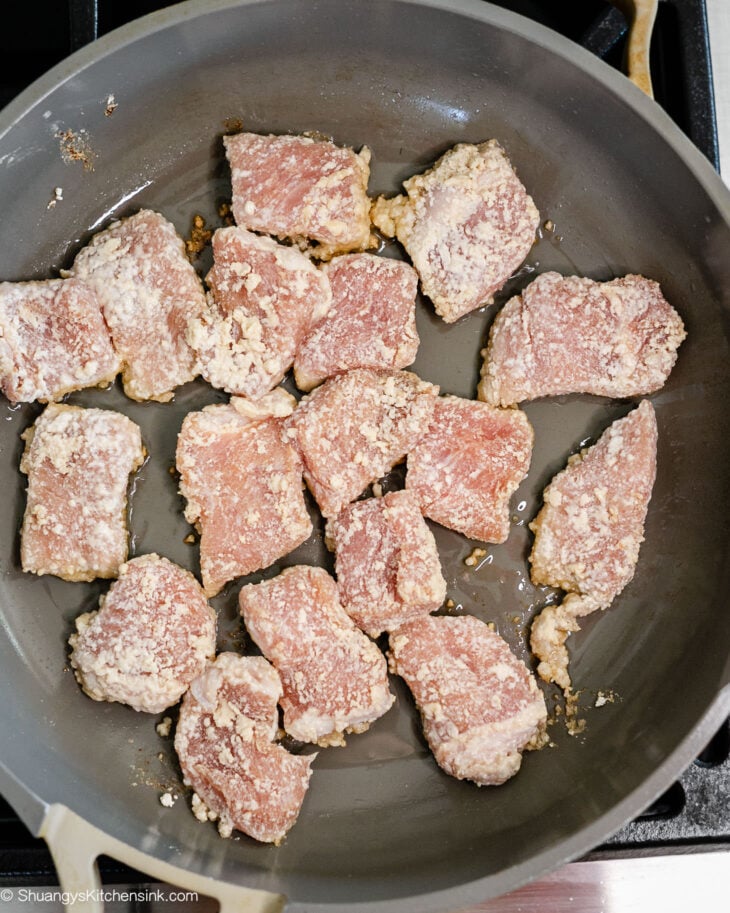
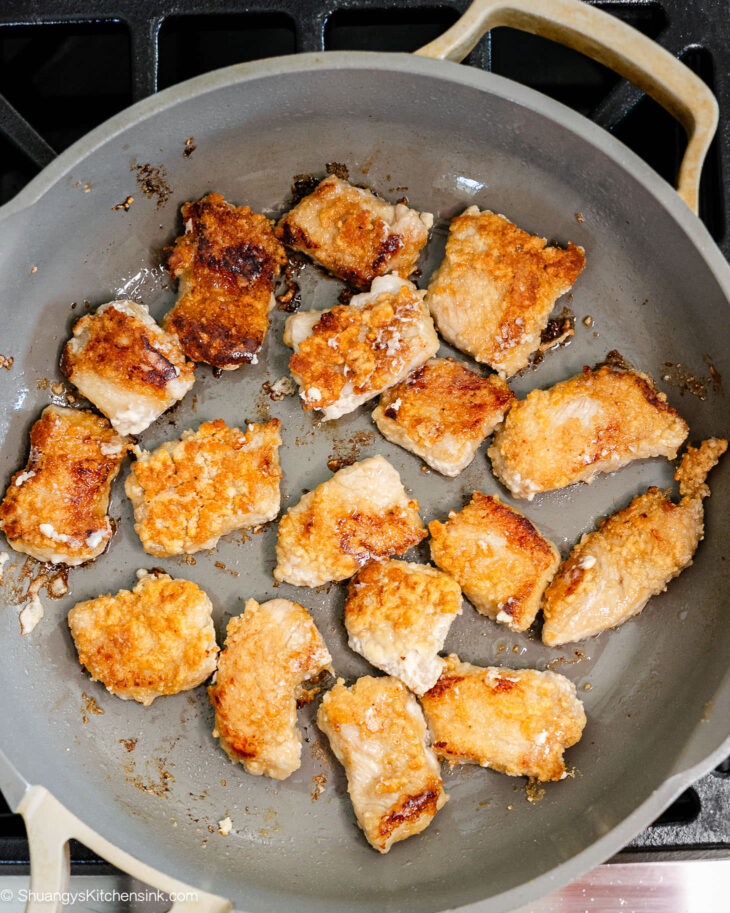
- Add the pork strips in a single layer (don’t overcrowd the pan) and fry for about 4–5 minutes per side, until golden brown and crispy. The internal temperature should reach at least 165°F (74°C).
- Transfer cooked pork to a plate lined with paper towels. Repeat with remaining pork, adding more oil if needed.
- Optional: For extra crunch, fry the pork a second time after the first batch has cooled slightly.
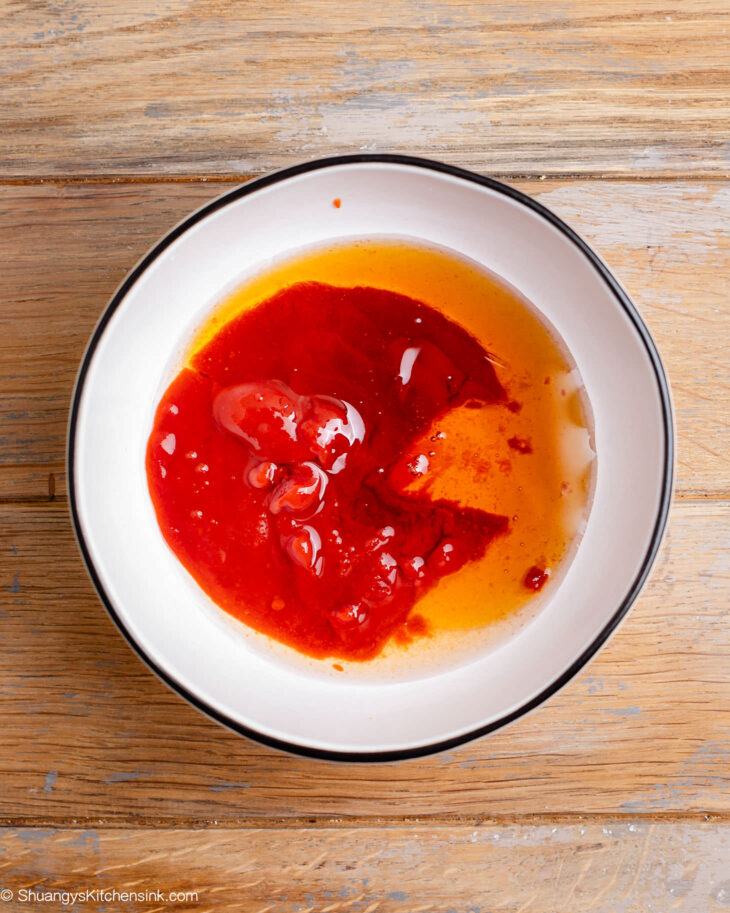
Make the Sauce
- In a small bowl, whisk together ketchup, rice vinegar, and honey (or sugar) until smooth.
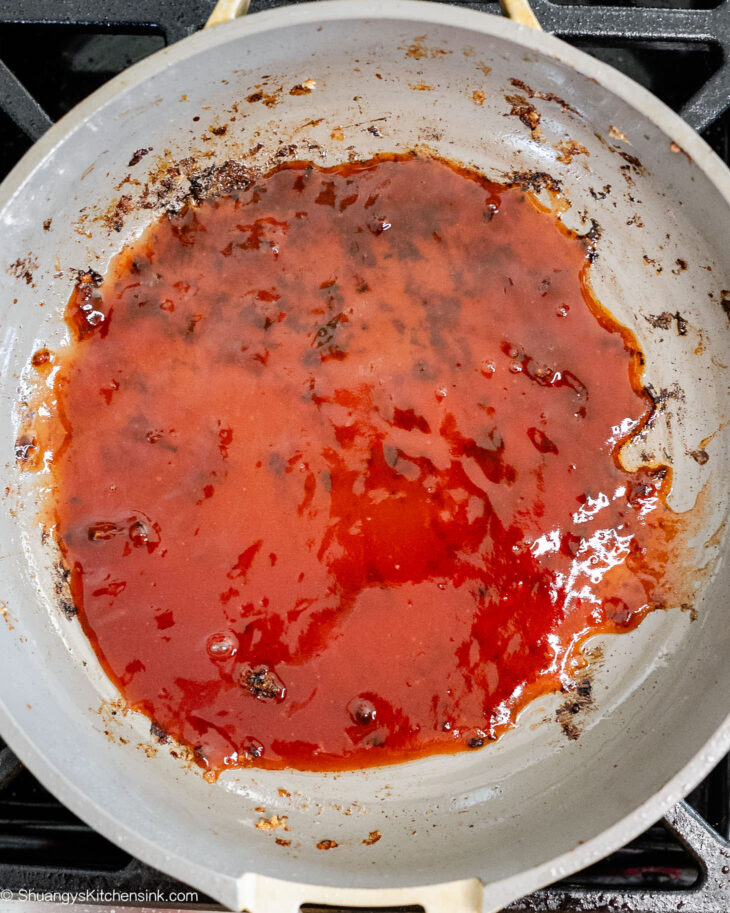
Combine Pork and Sauce
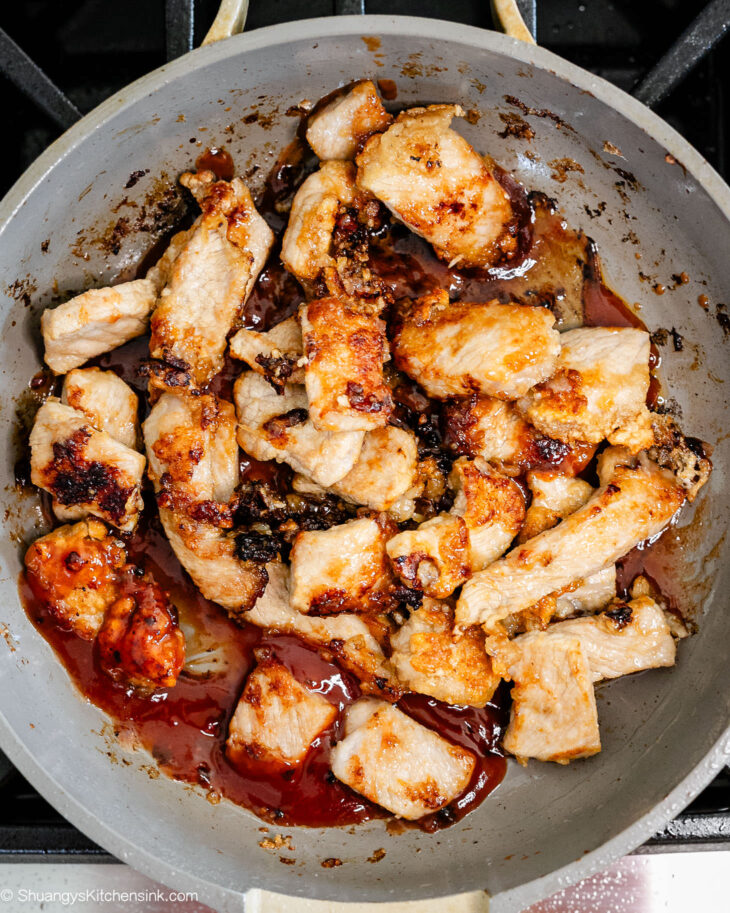
- Over medium to low heat, pour in the sauce back in the pan. Gently stir. The sauce should start thickening within a couple of minutes.
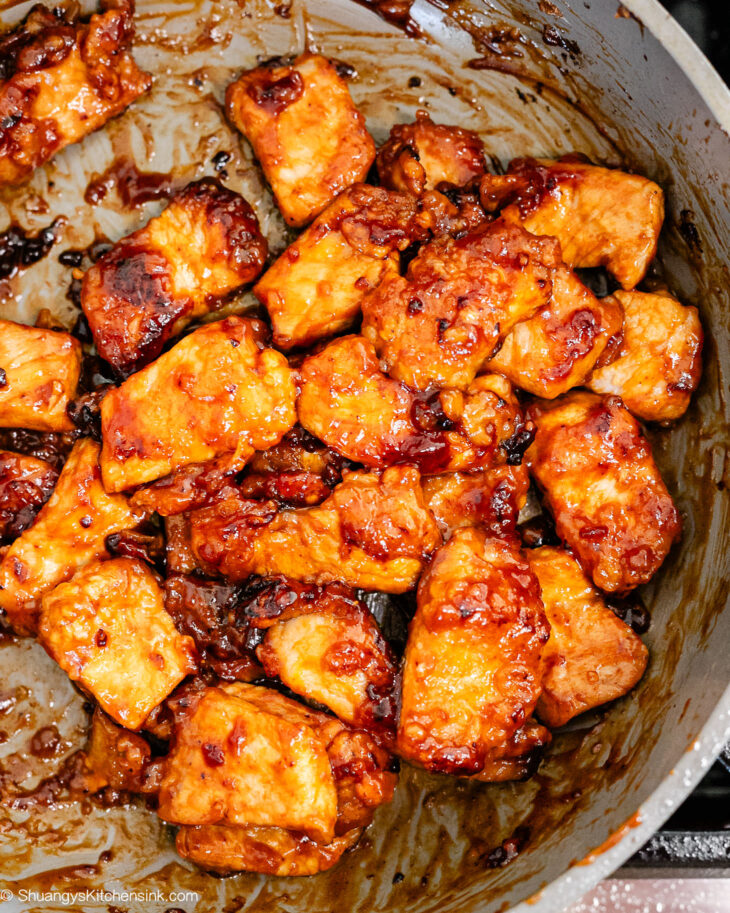
- Add in the pork and gently toss until each piece is coated. The sauce will thicken and cling to the pork as it heats.
Garnish and Serve
- Sprinkle with sesame seeds and green onions before serving.
- Enjoy immediately for the best texture!
Notes
- Shaoxing Wine: This traditional Chinese cooking wine adds depth and tenderness. If unavailable, use mirin or even a splash of whiskey—both work surprisingly well!
- Starch Choices: Cornstarch, arrowroot, and tapioca flour are all interchangeable in this recipe and give a crispy coating.
- Oil Tips: If double-frying, you may need to add more oil. Always allow the oil to reheat between batches for even crispiness.
- Veggie Add-Ins: For extra color and flavor, toss in pineapple chunks and bell peppers along with the sauce.
The Nutrition Facts above are specific to the ingredients I chose to use for this recipe, which may vary.
