Chinese Scallion Pancakes {My Mom’s Recipe}
Crispy, flaky, chewy, and soft all at once — these traditional Chinese scallion pancakes are one of my all-time favorite comfort foods. They’re perfect alongside stir fry, served as part of dim sum, or honestly just eaten straight from the pan while standing in the kitchen (my preferred method).

This is one of the most requested recipes I’ve ever gotten on Instagram, and I’m so excited to finally share it with you.
Both of my parents are incredible cooks, and being back in the kitchen cooking with them after so much time apart has been incredibly special. There’s just something about your parents’ cooking that no restaurant can ever replace, right?
After making these scallion pancakes with my parents over and over again these past few weeks, I finally learned all the little details that make them truly authentic — the texture of the dough, how thin to roll them, how to create those flaky layers, and all the tiny tricks that don’t usually make it into recipes.
And now I get to pass all of that on to you.
If this is your first time making Chinese scallion pancakes, don’t worry. I’m walking you through every step so you can make them successfully at home.
And when you do make them, please come back and let me know how they turned out. Hearing your feedback honestly makes my day.

What is Scallion Pancake to Me Growing up?
If you have never had a Chinese scallion pancake before, I would describe it as a crispy, flaky, savory, pizza-shaped flatbread with layers that are somehow both chewy and tender at the same time. You can eat it in so many different ways, but growing up, it was either breakfast food or lazy dinner food for me — the kind of comforting meal that always hit the spot.
My parents are from northern China, where flour-based foods are a huge part of everyday life. My grandma used to make scallion pancakes for me when I was little, and some of my favorite childhood memories are of helping her make the “油酥” filling, rolling out the dough together, and watching the pancake puff and bubble in the hot pan.
And then came the best part — pulling apart all the delicate flaky layers inside.
Truly, nothing reminds me more of home than scallion pancakes.
The crispy golden exterior, the soft layered dough inside, and the savory fragrance of scallions woven into every bite… it’s one of those foods that instantly brings me back to my childhood kitchen.
It still amazes me how a few of the simplest ingredients — flour, oil, scallions, salt, and water — can transform into something this comforting, flavorful, and beautiful. Like edible art made from pantry staples.

Tips for the Best Scallion Pancakes
My parents taught me so many little tricks while making these together, and these tips truly make a difference.
1. Salt makes the dough softer
The salt doesn’t just season the dough — it actually helps create a softer, more pliable texture.
2. The egg creates richness
The egg helps make the dough tender and easier to stretch without tearing.
3. Yes, you can skip the egg
Want to make them vegan? Or just ran out of eggs? My mom says:
“If you’re in a rush, just leave it out.” The pancakes will still turn out delicious.
4. Stretching creates layers
The longer you can gently stretch the dough cylinder without breaking it, the more flaky layers you’ll get in the final pancake.
And those layers are the best part.
Step-by-Step Instructions
Preparing the dough
First, in a large mixing bowl, combine flour and salt.

Then, crack an egg into the bowl (optional). Knead for about 5 minutes until a firm and smooth ball has formed.
Cover the dough with plastic wrap or a kitchen towel and let it rest at room temperature for 1 hour.

Pour the hot oil over the flour mixture and stir immediately until smooth.
How to serve Chinese Scallion Pancakes
These are honestly one of the best side dishes ever.
Serve them with:
- Stir fry
- Dumplings
- Dim sum
- Soups
- Braised dishes
Or eat them on their own as a savory breakfast or snack.
My kids love them fresh off the pan, and so do I.
Our latest favorite way is to use it like a taco shell. You can add some sliced up grilled chicken and some fresh cucumber or this spicy cucumber.

If you for some unlikely reason won’t eat all the Chinese Scallion Pancakes at once, don’t worry, you can totally freeze them!
Individually freeze the pancakes using a sheet pan to make sure they freeze flat. When they are frozen you can put them together and store them in a ziplock bag.
To reheat, defrost and heat up in a lightly greased pan. They won’t be as crispy as when first made, but they are still going to be delicious.
You can also freeze them before cooking using the same technique.
Defrost, and cook using the same method as described above.
If you have any questions on how to make them, leave me a comment below and I will get back to you as soon as I possibly can. And when you have tried them, let me know how you liked them! I love getting feedback on my recipes.

Get the recipe:Chinese Scallion Pancakes {My Mom’s Recipe}
Ingredients
For the Dough
- 2 1/2 cup all-purpose flour, 400 g
- 1/2 tsp salt, 4g
- 1 egg, optional
- 1 1/4 cup warm water *, 300 ml
For the Filling
- 3 tbsp all-purpose flour
- 2 tsp Chinese Five Spice Powder
- 1 cup chopped scallion, 3-4 stalks
- 1/2 cup oil, boiling
- 3 – 4 tbsp oil for frying
Equipment
Instructions
Make the Dough
- In a large mixing bowl, combine flour and salt.
- Slowly drizzle warm water into the flour. Gently mix it with a pair of chopsticks or a fork until flaky and very little to none dry flour left.
- Crack an egg into the bowl (optional) and knead for about 5 minutes until a firm and smooth ball has formed.
- Cover the dough with a kitchen towel or saran wrap and let the dough rest at room temperature for one hour.
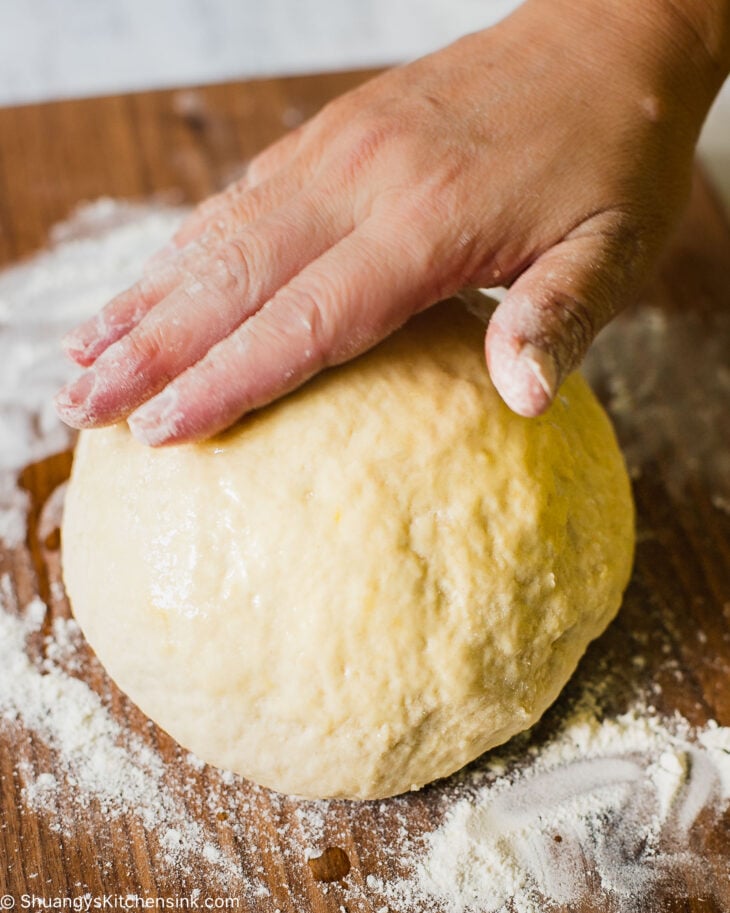
- Once the dough is rested, knead for additional two minutes.
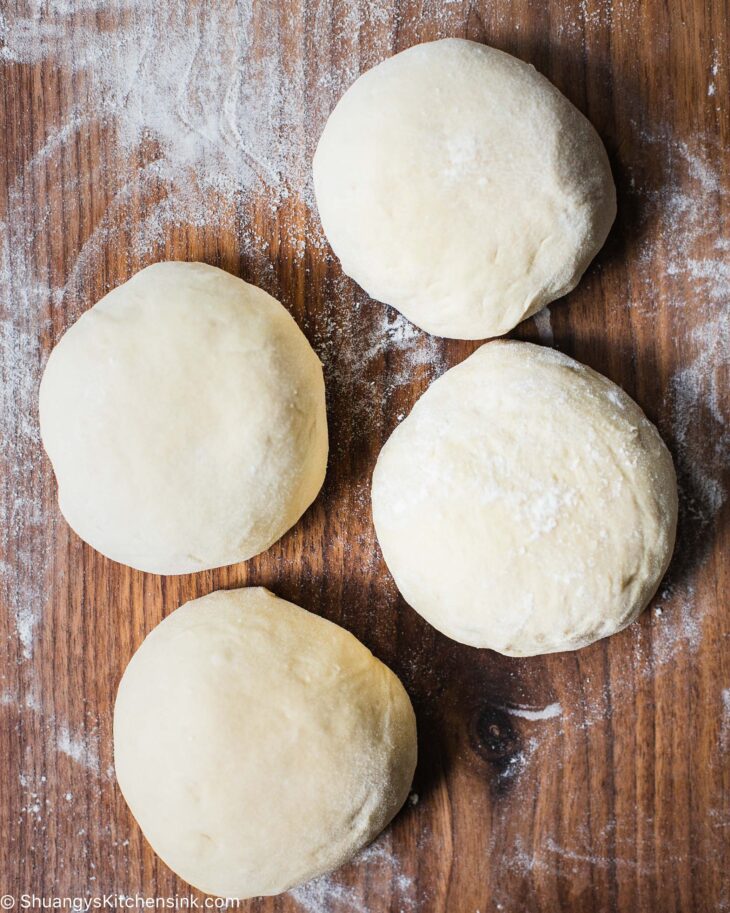
- Cut the dough into 4 to 5 even pieces, and knead into smooth balls. Cover while making the scallion pancake filling.
Make the Filling
- Bring the oil to a boil in a small pot.
- In a small bowl, combine flour, salt, and spices.
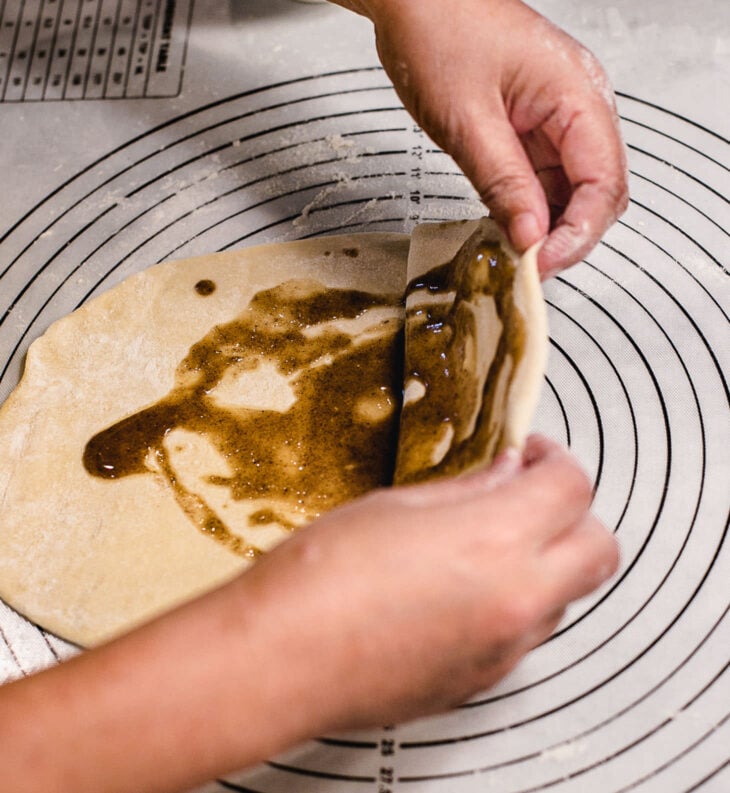
- Carefully pour the boiling oil into the spice bowl and whisk together using chopsticks or a fork.
Making the Scallion Pancake
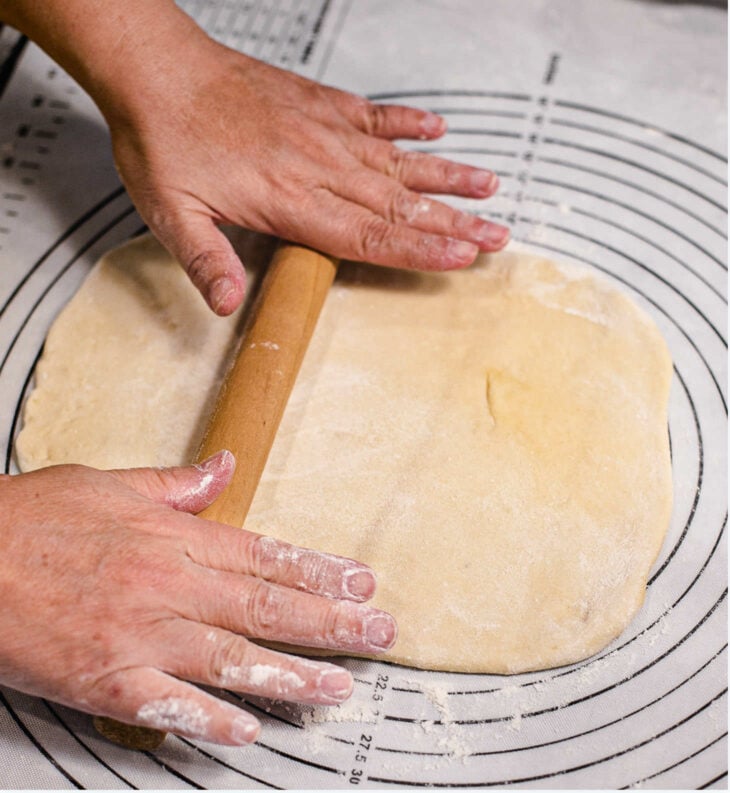
- On a smooth surface (a clean kitchen countertop or a silicone pastry mat), work one ball of dough at a time.
- Using a rolling pin, roll the dough ball into a thin, roughly rectangular shape. Lift the dough up from the work surface a couple of times to prevent sticking.
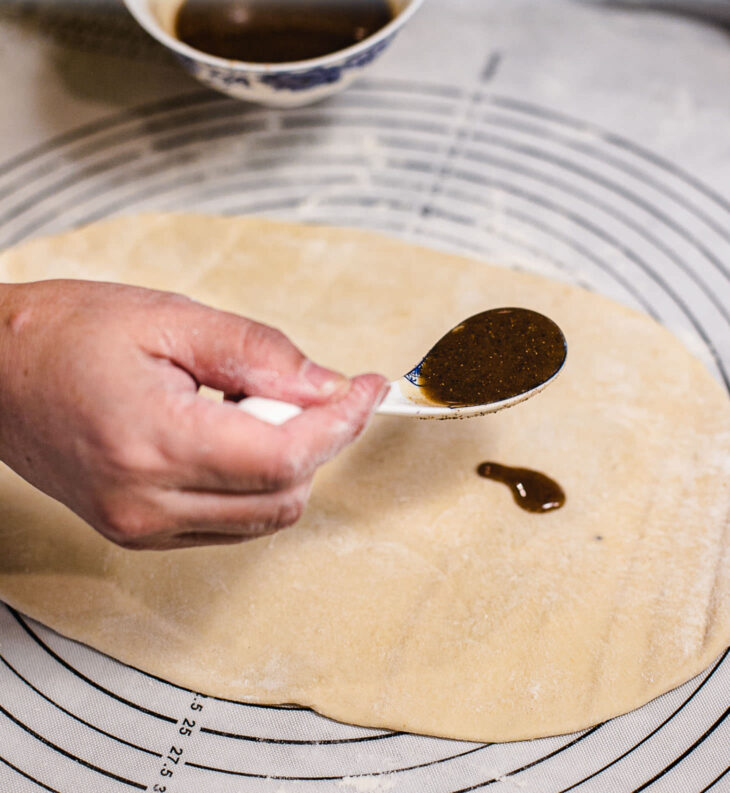
- Spread 1.5 – 2 tbsp of the filling onto the rectangular-shaped dough. Gently lift the dough one side at a time and gently fold over to smudge the filling around in order to get an even spread of the filling throughout the surface.
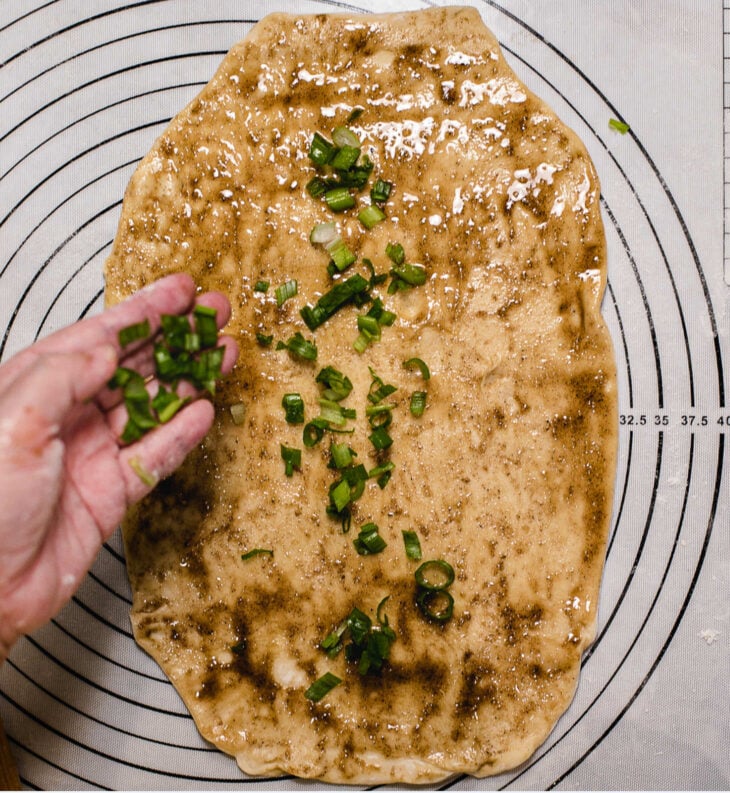
- Spread 1.5 – 2 tbsp of chopped scallions onto the dough.
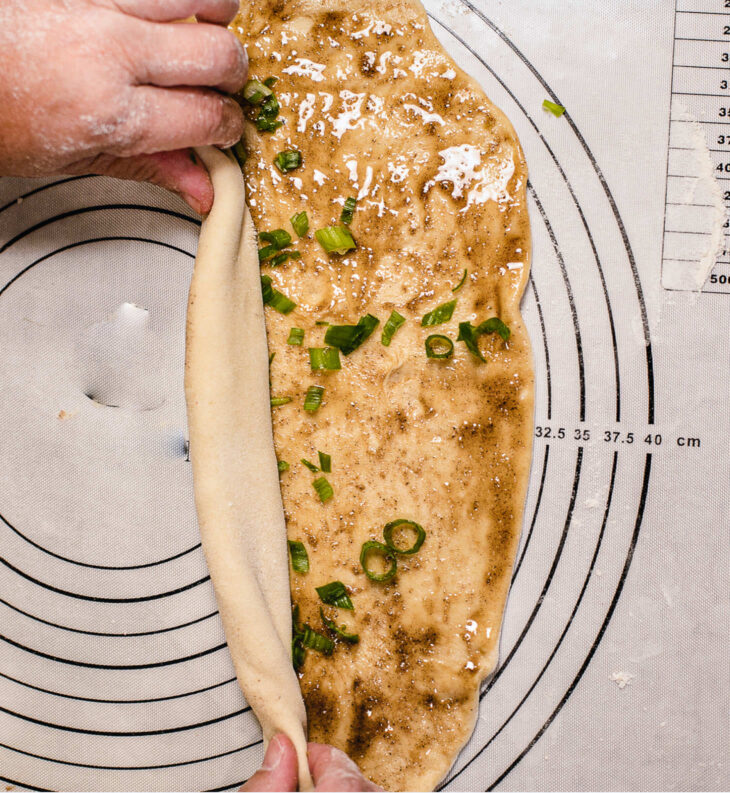
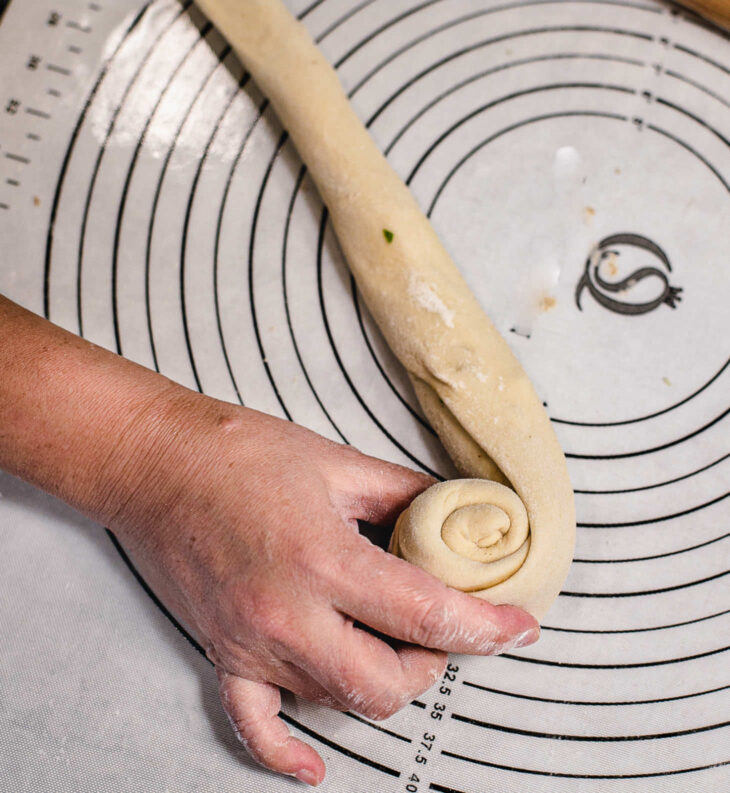
- Slowly roll the dough up to a cylinder starting from the long side.
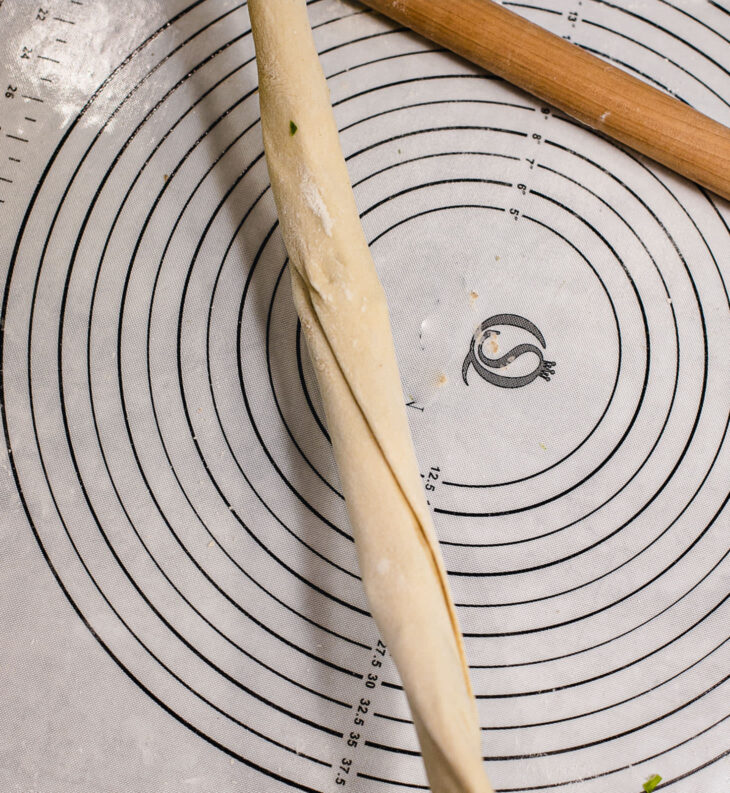
- Gently smooth out the edges and stretch the dough cylinder to about 1.5 – 2 times its original length.
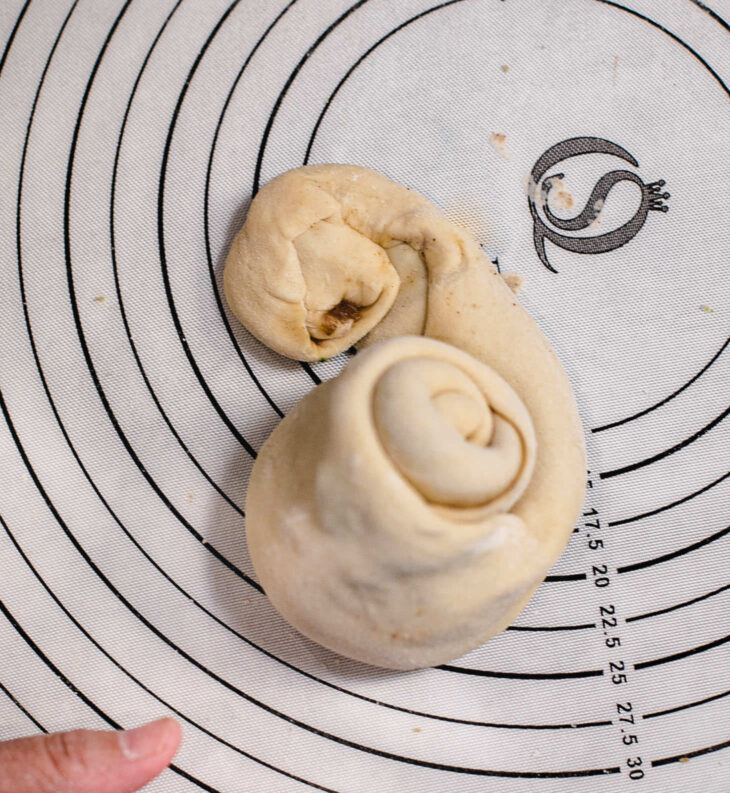
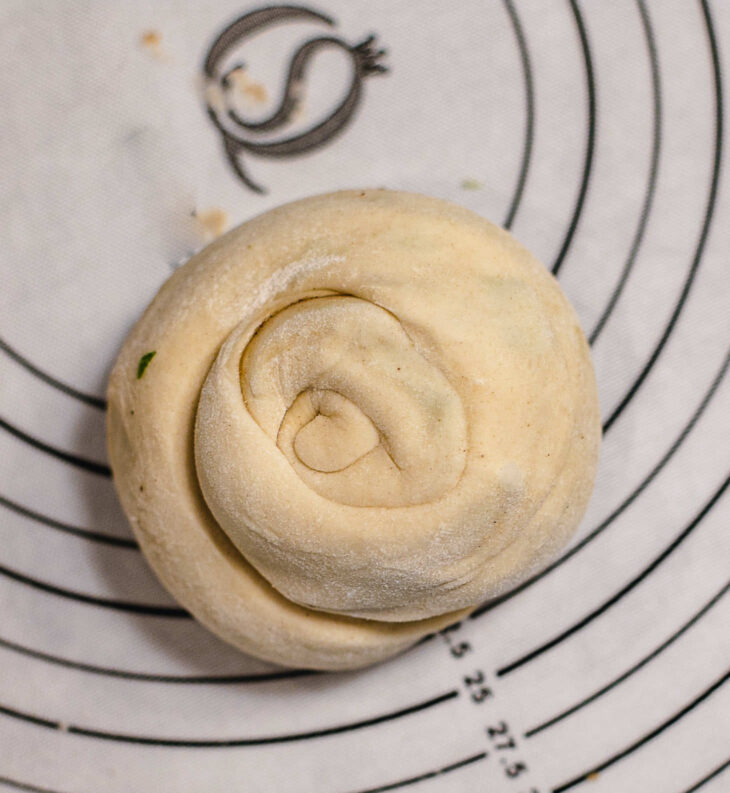
- Roll the cylinder into a pinwheel/cinnamon roll shape, leaving about 2 inches at the end of the roll. Flatten the end to seal, and tuck it under the rolled bun. Lightly press the rolled-up scallion bun down with the palm of your hand.
- Repeat the same steps for each of the individual dough balls.
Cook it
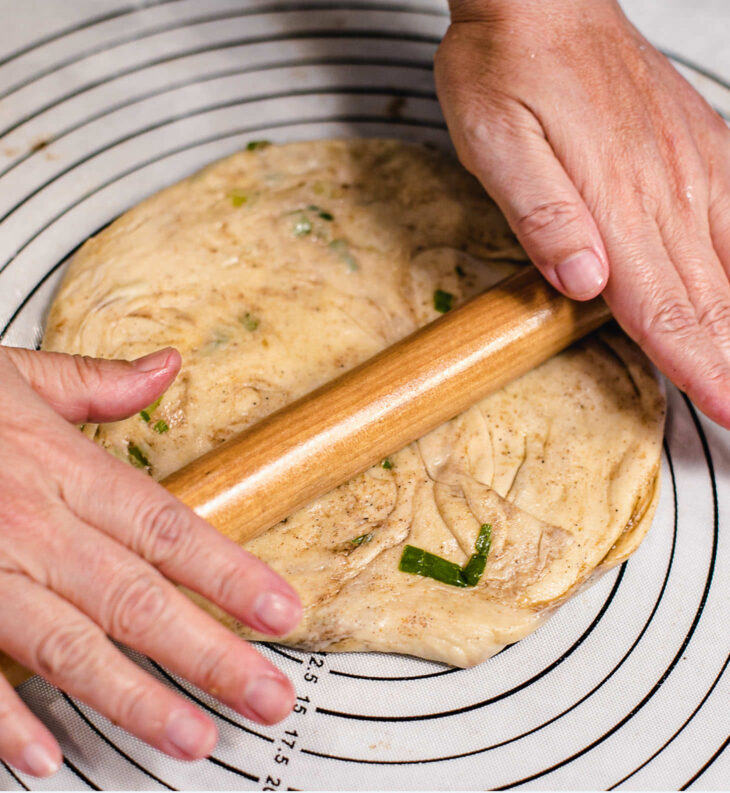
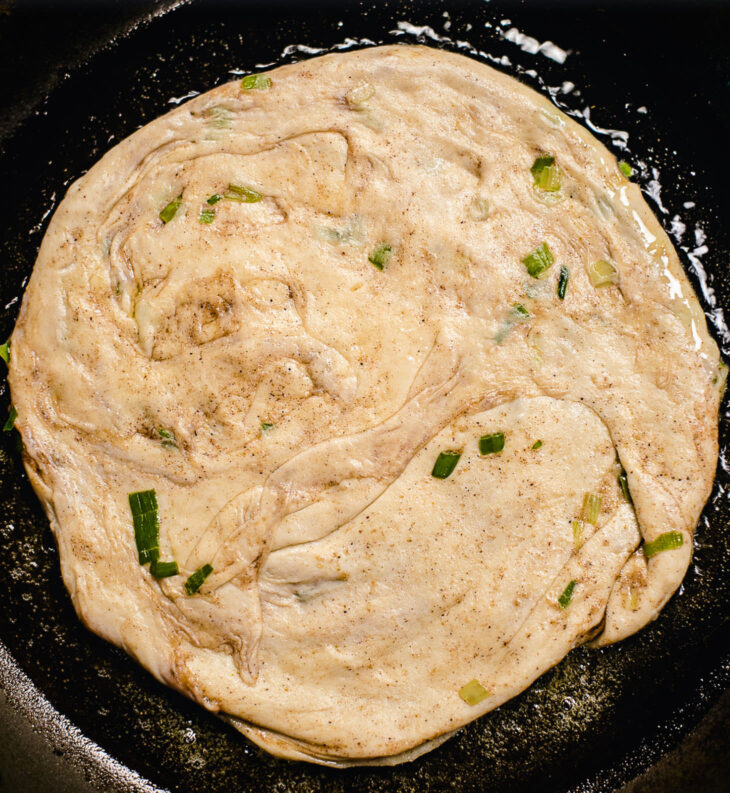
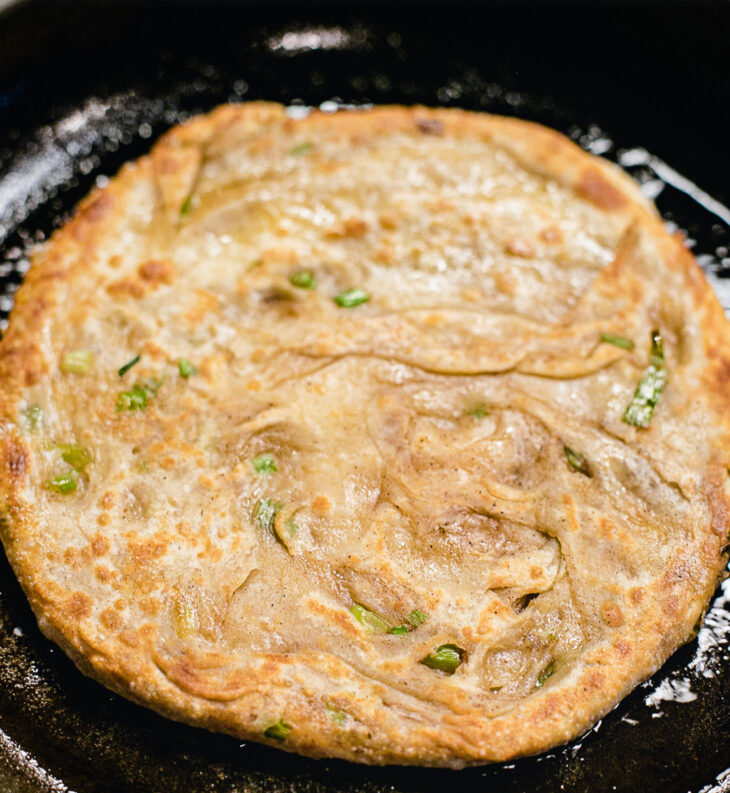
- Roll each bun into a circle (pancake shape).
- Over medium to high heat, heat a 10 – 12 inch pan with a generous amount of cooking oil to fully cover the bottom of the pan.
- Once the oil is hot, turn the heat to medium. Carefully add one pancake into the hot pan.
- Sear the pancake for 1 – 2 minutes or until golden brown. Flip and cover with a lid for 1 – 2 minutes. Flip and sear for another minute. Repeat 2 – 3 times until golden brown on both sides.
- Repeat these steps for each pancake.
Notes
The Nutrition Facts above are specific to the ingredients I chose to use for this recipe, which may vary.

Made these during a cultural food club meeting back during Chinese New Year (forgot to leave a review) and everybody loved them. Such a fun and yummy activity. Thanks for sharing the recipe, Shuangy! 🙂
Can you make these gluten free by using an all purpose gluten free baking flour?
Hi Meghan,
We haven’t tried that specifically- but it should work!
Let us know how it turns out if you try it!
Happy Cooking!
-Constance